
Basic Countermeasures Equipment
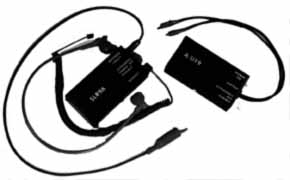
SLR9A/AUT9 - SILENT LINE TRACER
The AUT9 generates either a swept ultrasonic (above normal hearing range) or audible tone. Since the ultrasonic tone cannot be heard it can be applied to a line even while it is in use for voice communication. The SLR9A receiver converts the ultrasonic tone back to the audible range. The ultrasonic tone can be traced with either the SLR9A or an inexpensive AM radio. The audible tone can be traced with the SLR9A, AM radio or 1059 preamplifier. Both units measure 1x2x4 inches and require a standard 9-volt battery. The SLR9A is supplied with flexible test cable and headset.
The AUT9 generates either a swept ultrasonic (above normal hearing range) or audible tone which is applied via the small alligator clips to the line under test. The AUT9 is input protected to 400 volts DC or the 100+ volt 20/30 Hz AC telephone ring signal. DO NOT CONNECT THE AUT9 TO 110 OR 220 VAC SO/60 HZ POWER LINES. Use the neutral and ground wires for tracing these lines. If a ground does not exist, make sure the lines contain NO AC voltage. The ULTRASONIC tone can not be heard so it can be applied to a telephone line even when in use. The SLR9A receiver converts the tone from the AUT9 to normal audible frequencies.
OPERATION: Insert the special 2,000 ohm headset supplied into the SLR9A HEADSET jack. Use either the ear hook or gray stethoscope tube. If the stethoscope tube is used, it is worn under the chin with the sound output holes facing slightly (30 degrees) forward. If the ear hook is used, it can be adjusted for either ear. Insert the RED input cable into the ANTENNA jack. Place the power switch in the ULTRASONIC position. Hold the SLR9A case in one hand (YOU are the ground return) and use the other hand to hold the RED probe (antenna) wire. Touch the probe to the terminals under test until the signal is located. There is no volume control and the output is automatically limited to a comfortable level. Once the wire to which the AUT9 is connected is located, determine if it in use by switching the SLR9A to the AUDIBLE position. The AUDIBLE position of the SLR9A can also trace the AUDIBLE tone of the AUT9.
The AUDIBLE tone from the AUT9 can be traced with the SLR9A, an audio amplifier (such as the 1059) or an AM radio. To trace a pair of wires, connect the AUT9 across the pair. Search with the SLR9A or 1059 until the pair is located. To trace a wire bundle, connect one lead of the AUT9 to any wire in the bundle and the other lead to EARTH GROUND. This is usually the ground pin of an AC outlet. Tune an AM radio to the bottom of the band (540 KHz) and hold it at right angles next to the bundle. Follow the signal.
The ULTRASONIC tone can be traced with either the SLR9A or AM radio. Connect the AUT9 across the wire pair and place the power switch in ULTRASONIC. Search with the SLR9A in ULTRASONIC until the tone is located. Locating a wire bundle in ULTRASONIC is the same as in AUDIBLE. Connect one lead from the AUT9 to any wire in the bundle and the other to EARTH GROUND. Search for the tone with either the SLR9A or AM radio. When using the AM radio it may be necessary to tune about the low end of the band to locate the best harmonic of the ultrasonic tone (i.e. find the loudest). Follow the signal.
|
To be contacted for a confidential consultation please E-mail: jmatk@tscm.com
or send a letter via US Mail to:
or call:
URL: http://www.tscm.com/ |